Materials:
*H/5.00 mm Crochet Hook (I use Susan Bates)
*Yarn: Caron Simply Soft in White (Contrast A) and Neon Pink (Contrast B)
You can use any light or worsted weight yarn. I prefer the Caron Simply Soft because it a bit thinner than regular worsted weight and it's shiny.
*Tapestry Needle for weaving in ends
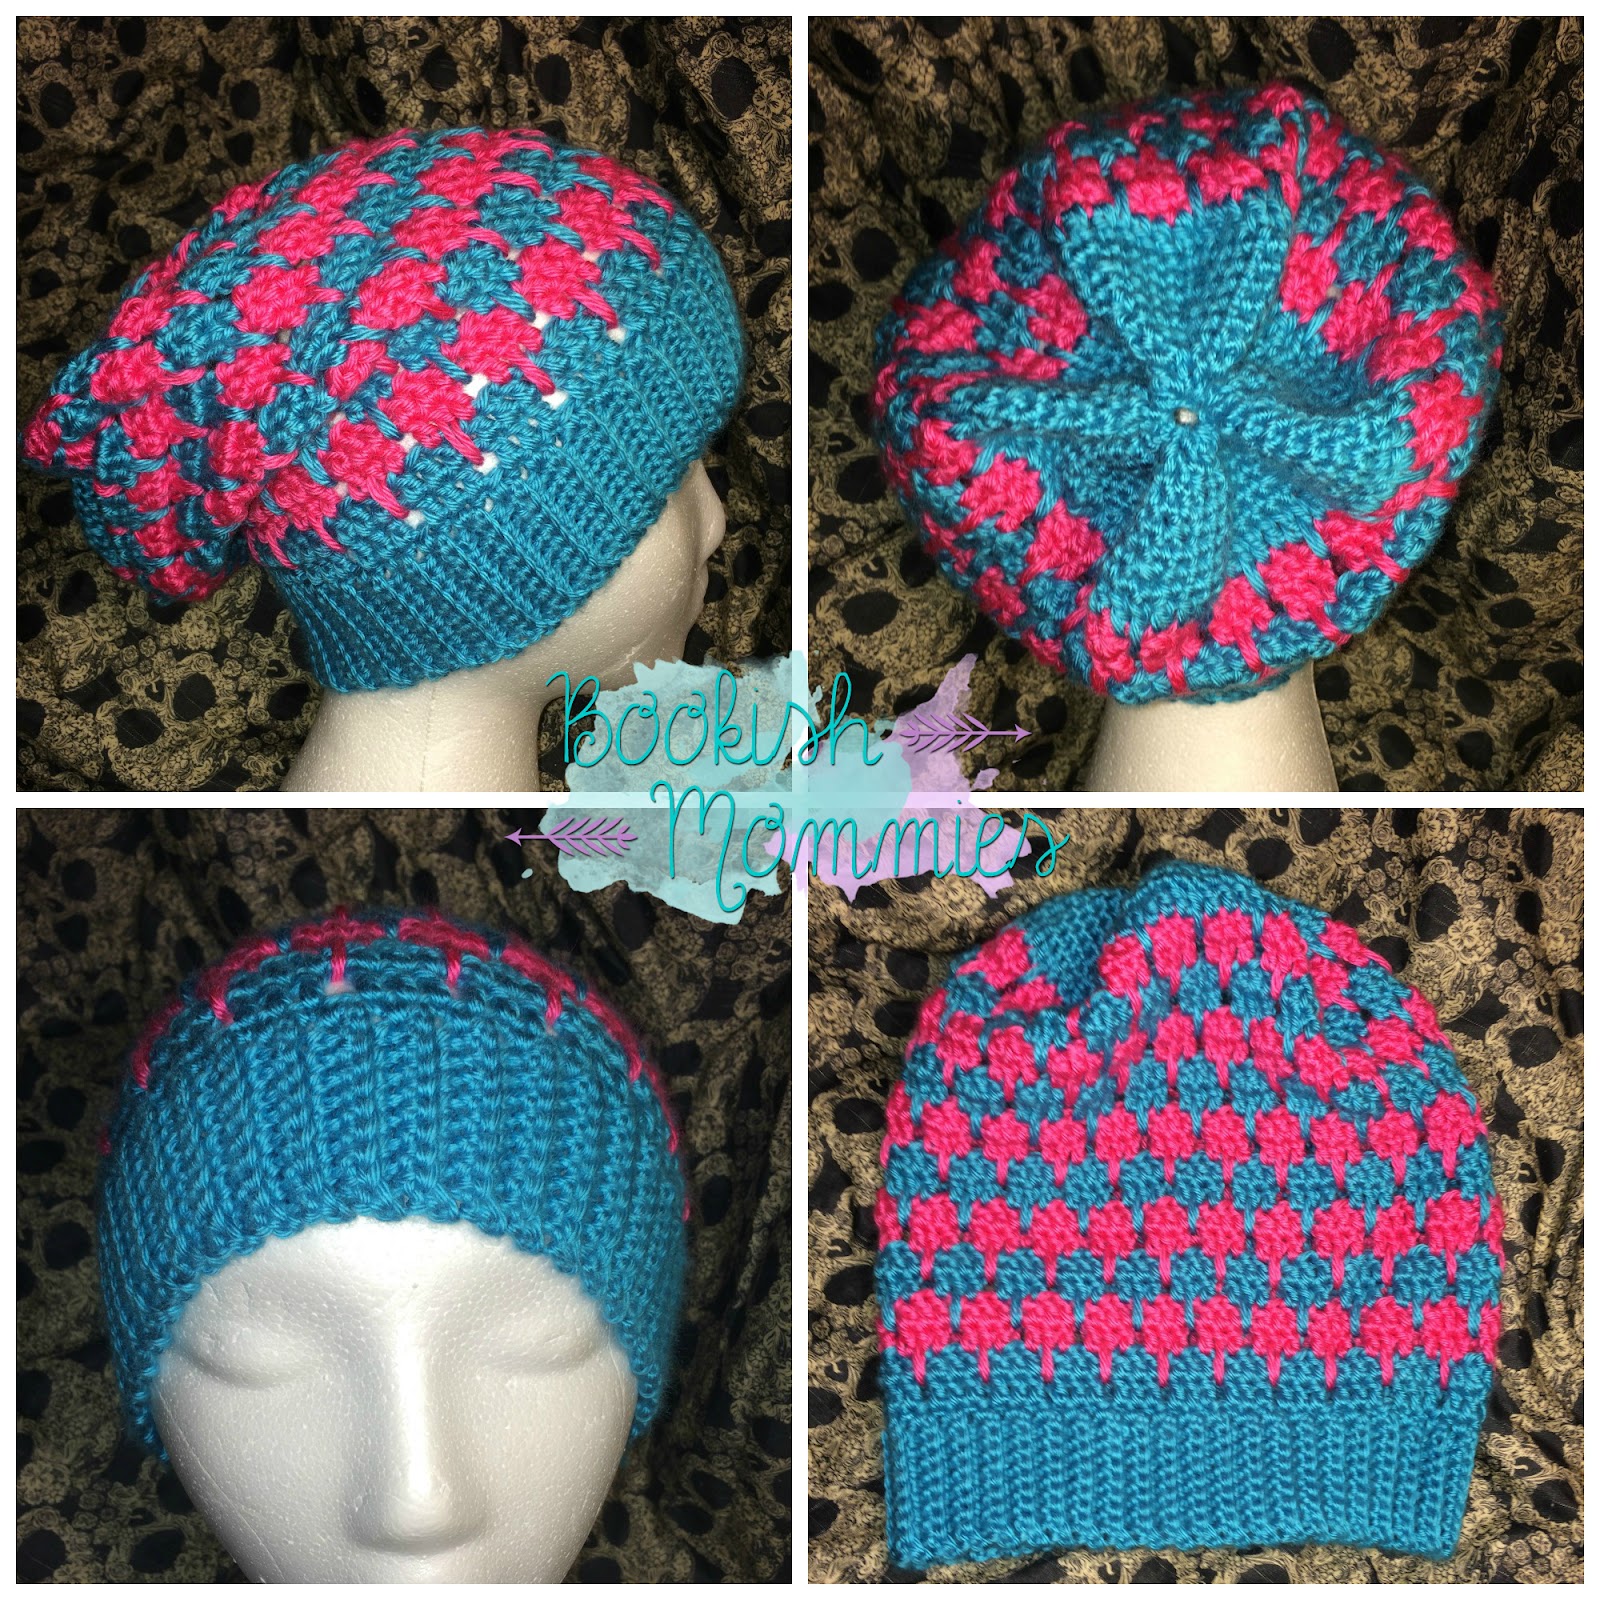
This slouch is made from the bottom up cause that’s how I roll….mostly because I like the way it looks when it’s finished this way as opposed to working in the round from the top.
You can even add more colors to the mix to give it a funky look. I’m sure I’ll make one with more colors soon.
I’ve never written one before so I’m sure there will be mistakes. Let me know if you get stuck or have any suggestions. Thanks!!
Ren
Lukesmommy85@gmail.com
Band:
Working with Contrast A
Make a slip knot.
Chain 11.
SC in 2nd chain from the hook. SC in each chain till you get to the end of the row. You should have 10 single crochets.
Ch. 1 and turn.
10 SC in the back loop only on each row. This will create that ribbed effect.
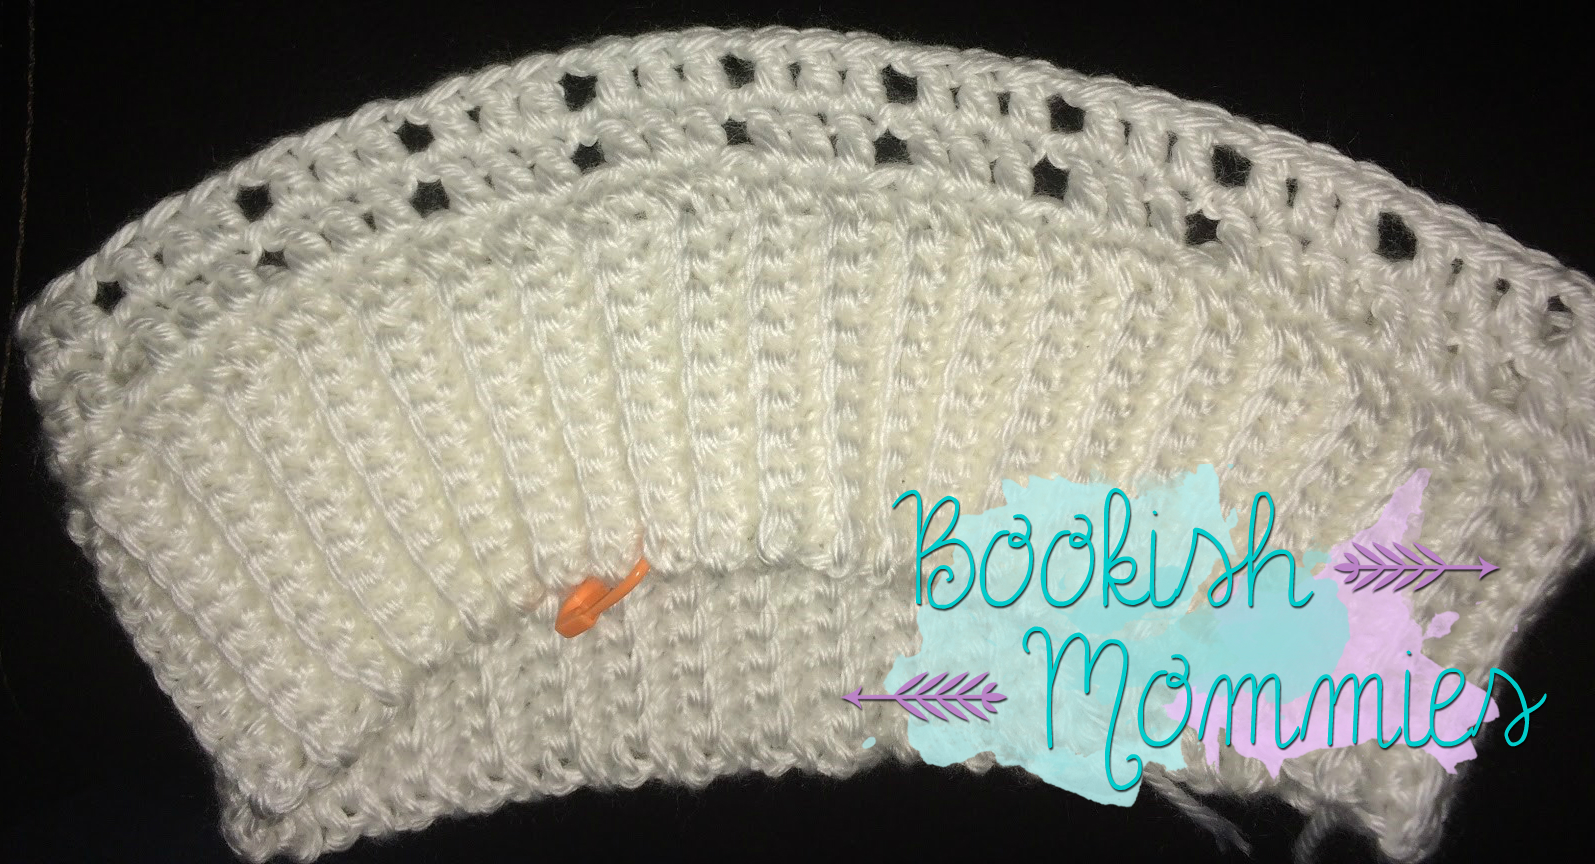
Continue making SC rows until you’ve reached your desired length. I used 80 rows. The length has to be divisible by 4 as the larkfoot stitch works in rounds of 4 for each. This would make it so that you have 20 sets around. Slip stitch both ends together to form the band. (slip stitch each chain together vertically so you'll have a nice seam) Do not fasten off.
Slouchy:
Keep Contrast A for this row
Chain 1
Crochet 80 SC evenly around the brim. You'll be working horizontally on the brim.
Row 1:
SL ST into the top of the CH 1
Chain 3 (Counts as the first stitch)
Crochet 2 DC in the next two stitches
Chain 1 skip next stitch
*DC in the next 3 stitches, ch 1 skip next stitch* (Repeat this pattern all the way around)
SL ST into the top of the chain 3 from the beginning of the row.
Row 2:
Repeat row 1
Fasten off and weave in ends
This is how it should look after rows 1&2.
Row 3:
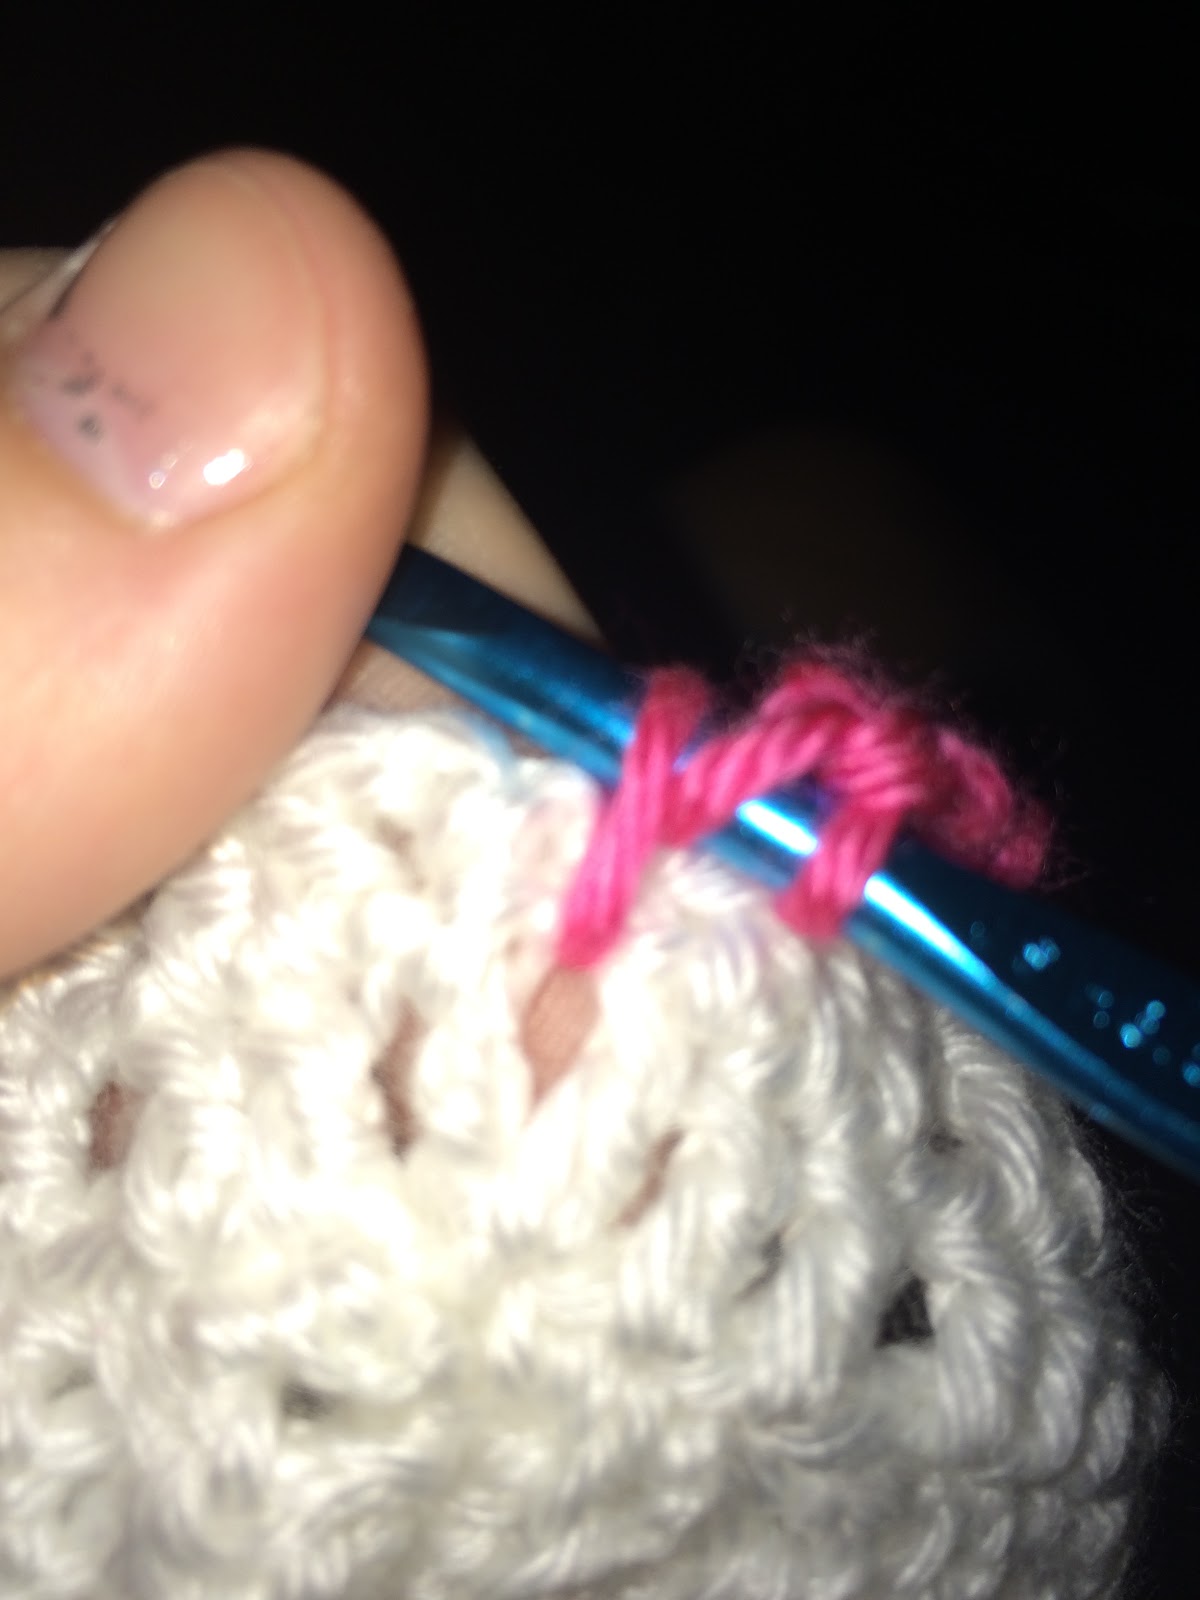
Switch to Contrast B (I attach contrast B to to the chain three of the previous row)
Chain 4 (Counts as the first stitch and a chain 1)
Skip the next chain space and DC in the next one.
This will be your first larksfoot stitch.
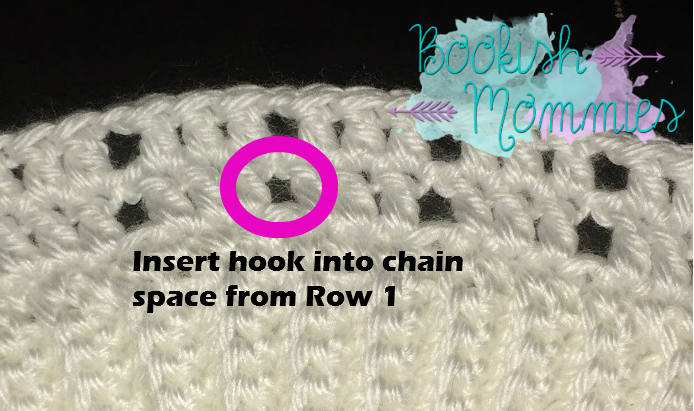
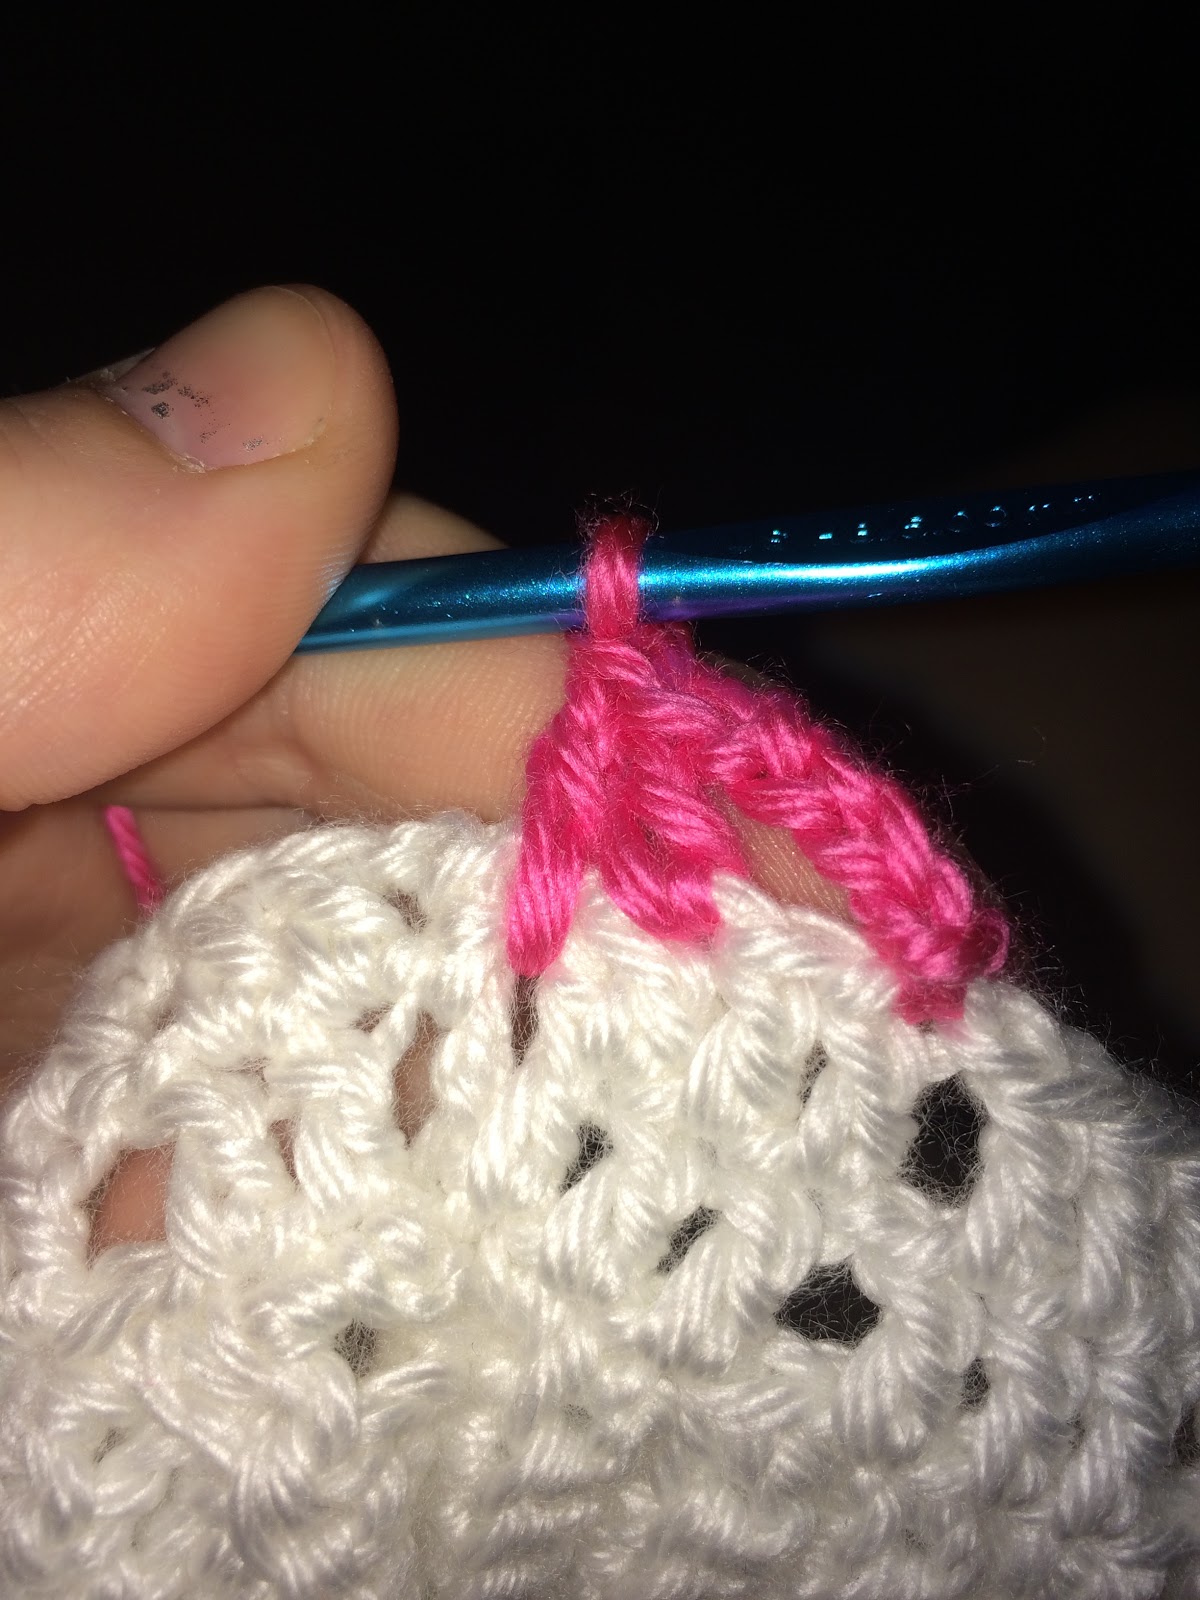
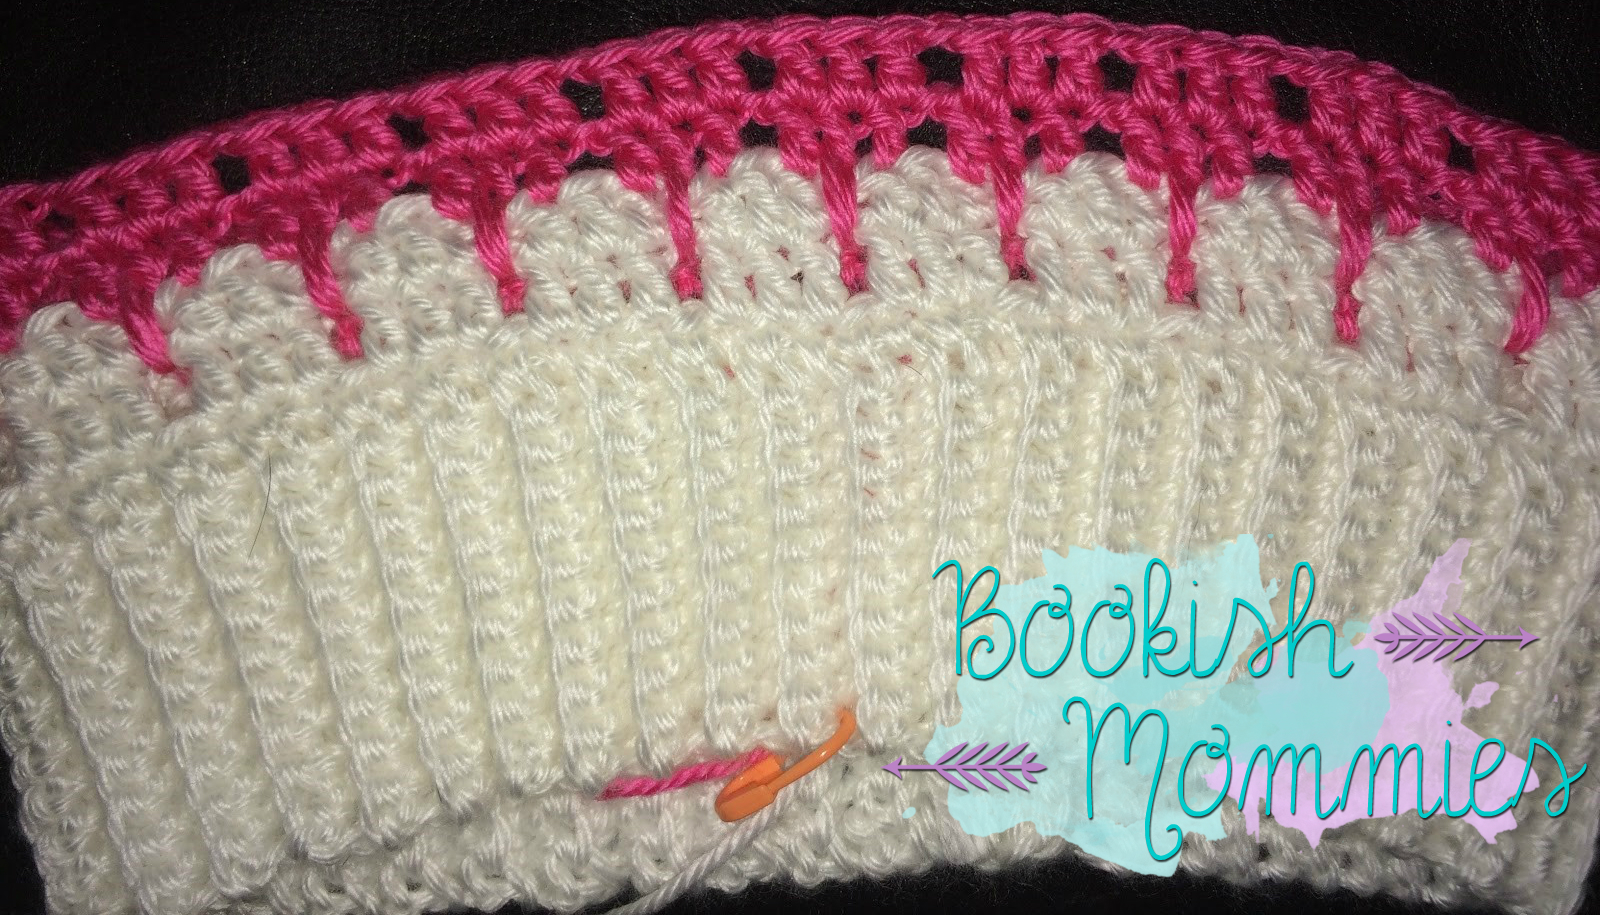
YO like you would for a DC. Insert your hook into the CH SPACE from two rows below. (Pictured below) Pull up the yarn so it's almost at the height of the previous DC. YO and pull the yarn through two loops on your hook. YO again and pull through the last loops on your hook.
*DC in the next CH, CH 1 skip next stitch , DC, Extended DC (larksfoot stitch)* (repeat this all the way around)
SL ST into the top of the chain 3 from the beginning of the row.
This is how row one of Contrast B will look like
Row 4:
Chain 4 (Counts as the first stitch and a chain 1)
Skip the next chain space.
*DC in the next three spaces then CH 1 skip next stitch* (repeat this all the way around)
SL ST into the top of the chain 3 from the beginning of the row.
Fasten off and weave in ends
After row 4, you'll have two contrast b rows with 2 chain spaces between each set. These are where your extended double crochet will go.
Rows 3 & 4 completed
Row 5:
Switch to Contrast A
Chain 3 (Counts as the first stitch)
Extended DC (larksfoot stitch) then DC in the next space.
*CH 1 skip next stitch, DC, Extended DC (larksfoot stitch), DC* (repeat this all the way around)
SL ST into the top of the chain 3 from the beginning of the row.
I like to start my chain 3 where you joined the chain 4 from the previous round.
Row 6:
Chain 3 (Counts as the first stitch)
DC in the next two spaces.
*Chain 1 skip next stitch, DC in the next three spaces*(repeat this all the way around)
SL ST into the top of the chain 3 from the beginning of the row.
Fasten off and weave in ends
Rows 7&8:
Switch to Contrast A
Repeat rows 3 & 4
Fasten off and weave in ends
Rows 9&10:
Switch to Contrast B
Repeat rows 5&6
You can keep repeating the rows until you get to your desired height.
I used 22 rows total then started my SC rows and decreases for the top of the hat.
For your last two rows, you'll honor the larksfoot stitch by going around and doing the DC, Extended DC, DC but instead of chaining one to get the space in between, you'll just continue on with a DC. After you finish the last row of larksfoot stitches, you're just going to chain 3 then DC in each space going around and SL ST at the end. (I like to use the same color for the top that I used for the brim of the hat. You can change it up if you’d like. Even make it funky by alternating colors after every two rows)
Finishing up:
Here is where you'll make the top of the hat and close it up.
Switch to Contrast A (Or whichever color you’d like that hat to be)
SC Row 1:
Chain 1
SC in the same stitch as the CH 1, SC all around, SL ST into the top of CH 1 (The amount of single crochet's will vary depending on the amount of rows you have) If you use the same about of rows that I did, you should have 80 SC.
SC Row 2:
Chain 1
SC in the same stitch as the CH 1, 3 SC, SC Dec (Decrease)
*4 SC, SC Dec (Decrease)* (repeat all the way around)
SL ST into the top of the chain 1 from the beginning of the row. (You should be left with 64 SC)
SC Row 3:
Chain 1
SC in the same stitch as the CH 1, SC all around, SL ST into the top of CH 1 (64 SC)
SC Row 4:
Chain 1
SC in the same stitch as the CH 1, 2 SC, SC Dec (Decrease)
*3 SC, SC Dec (Decrease)* (repeat all the way around)
SL ST into the top of the chain 1 from the beginning of the row. (You should be left with 48 SC)
SC Row 5:
Chain 1
SC in the same stitch as the CH 1, SC all around, SL ST into the top of CH 1 (48 SC)
SC Row 6:
Chain 1
SC in the same stitch as the CH 1, 1 SC, SC Dec (Decrease)
*2 SC, SC Dec (Decrease)* (repeat all the way around)
SL ST into the top of the chain 1 from the beginning of the row. (You should be left with 32 SC)
SC Row 7:
Chain 1
SC in the same stitch as the CH 1, SC all around, SL ST into the top of CH 1 (32 SC)
SC Row 8:
Chain 1
SC in the same stitch as the CH 1, 1 SC, SC Dec (Decrease)
*1 SC, SC Dec (Decrease)* (repeat all the way around)
SL ST into the top of the chain 1 from the beginning of the row. (You should be left with 16 SC)
SC Row 9:
Chain 1
SC in the same stitch as the CH 1, SC all around, SL ST into the top of CH 1 (16 SC)
Do not fasten off. Leave a long tail (about 15 inches) Turn your hat inside out. Working in the opposite direction of where you slip stitched, use your tapestry needle to weave the yarn in and out of both loops. Push the chains together as you're weaving. Once you make it to the end, weave in the end of the yarn making sure it's tight and secure.
Clearly I got lazy with the first slouchy I did..instead of doing a row of SC in between every decrease row, I just did every row as decreases. It has a different look in the back but they both still look awesome.
©2015 Bookish Mommies
This is a free pattern. This pattern may not be reproduced, transmitted or distributed in any way, including, but not limited to, images and text. Images are the sole property of Bookish Mommies and are not to be used for resale, personal reasons, or any other means. The sale of your finished product is permitted; we just ask that you note the pattern was designed by Bookish Mommies and include this link to our blog http://www.bookishmommies.com/.


